LoRa gateway with Raspberry Pi and LoraFlow (sx1276, E32-868T30D, E32-868T20D)
This example shows how to connect a LoRa module to a Raspberry PI and use this setup as a Lora gateway. Using the loraflow script, data are transformed from LoRa signal to JSON messages and data are stored in OnlineDB.NET
Keep in mind that modules E32-868T30D and E32-868T20D are single channel modules

1) Hardware necessary: Raspberry Pi 3 or 4, SD card, and Lora module.
Choose between 8km module: http://www.ebyte.com/en/product-view-news.aspx?id=132 or 3km module http://www.ebyte.com/en/product-view-news.html?id=189
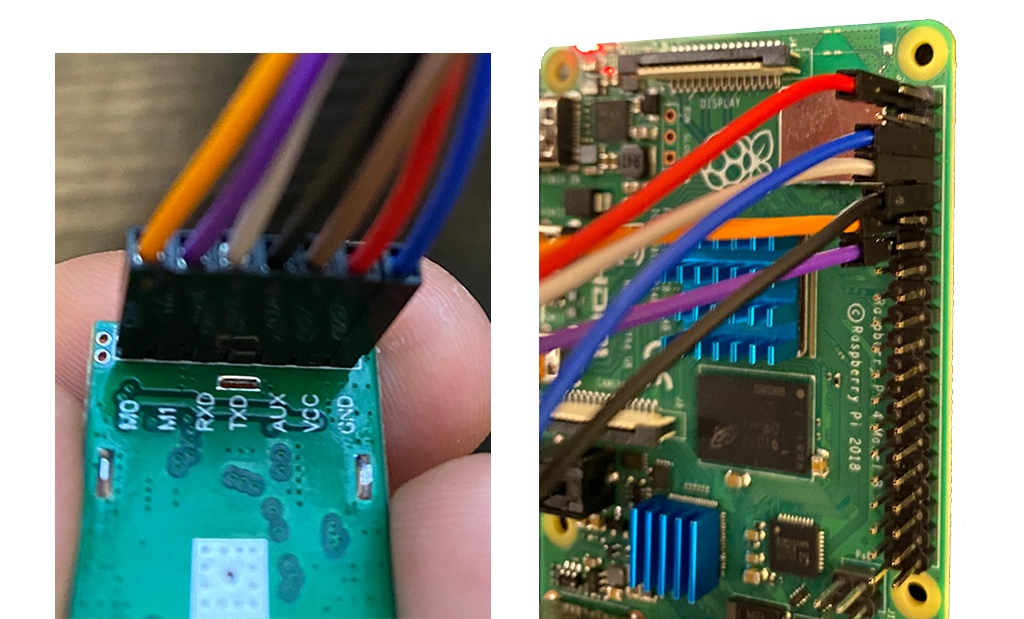
2) Connect the wires between the raspberry pi and the LoRa module as shown in table

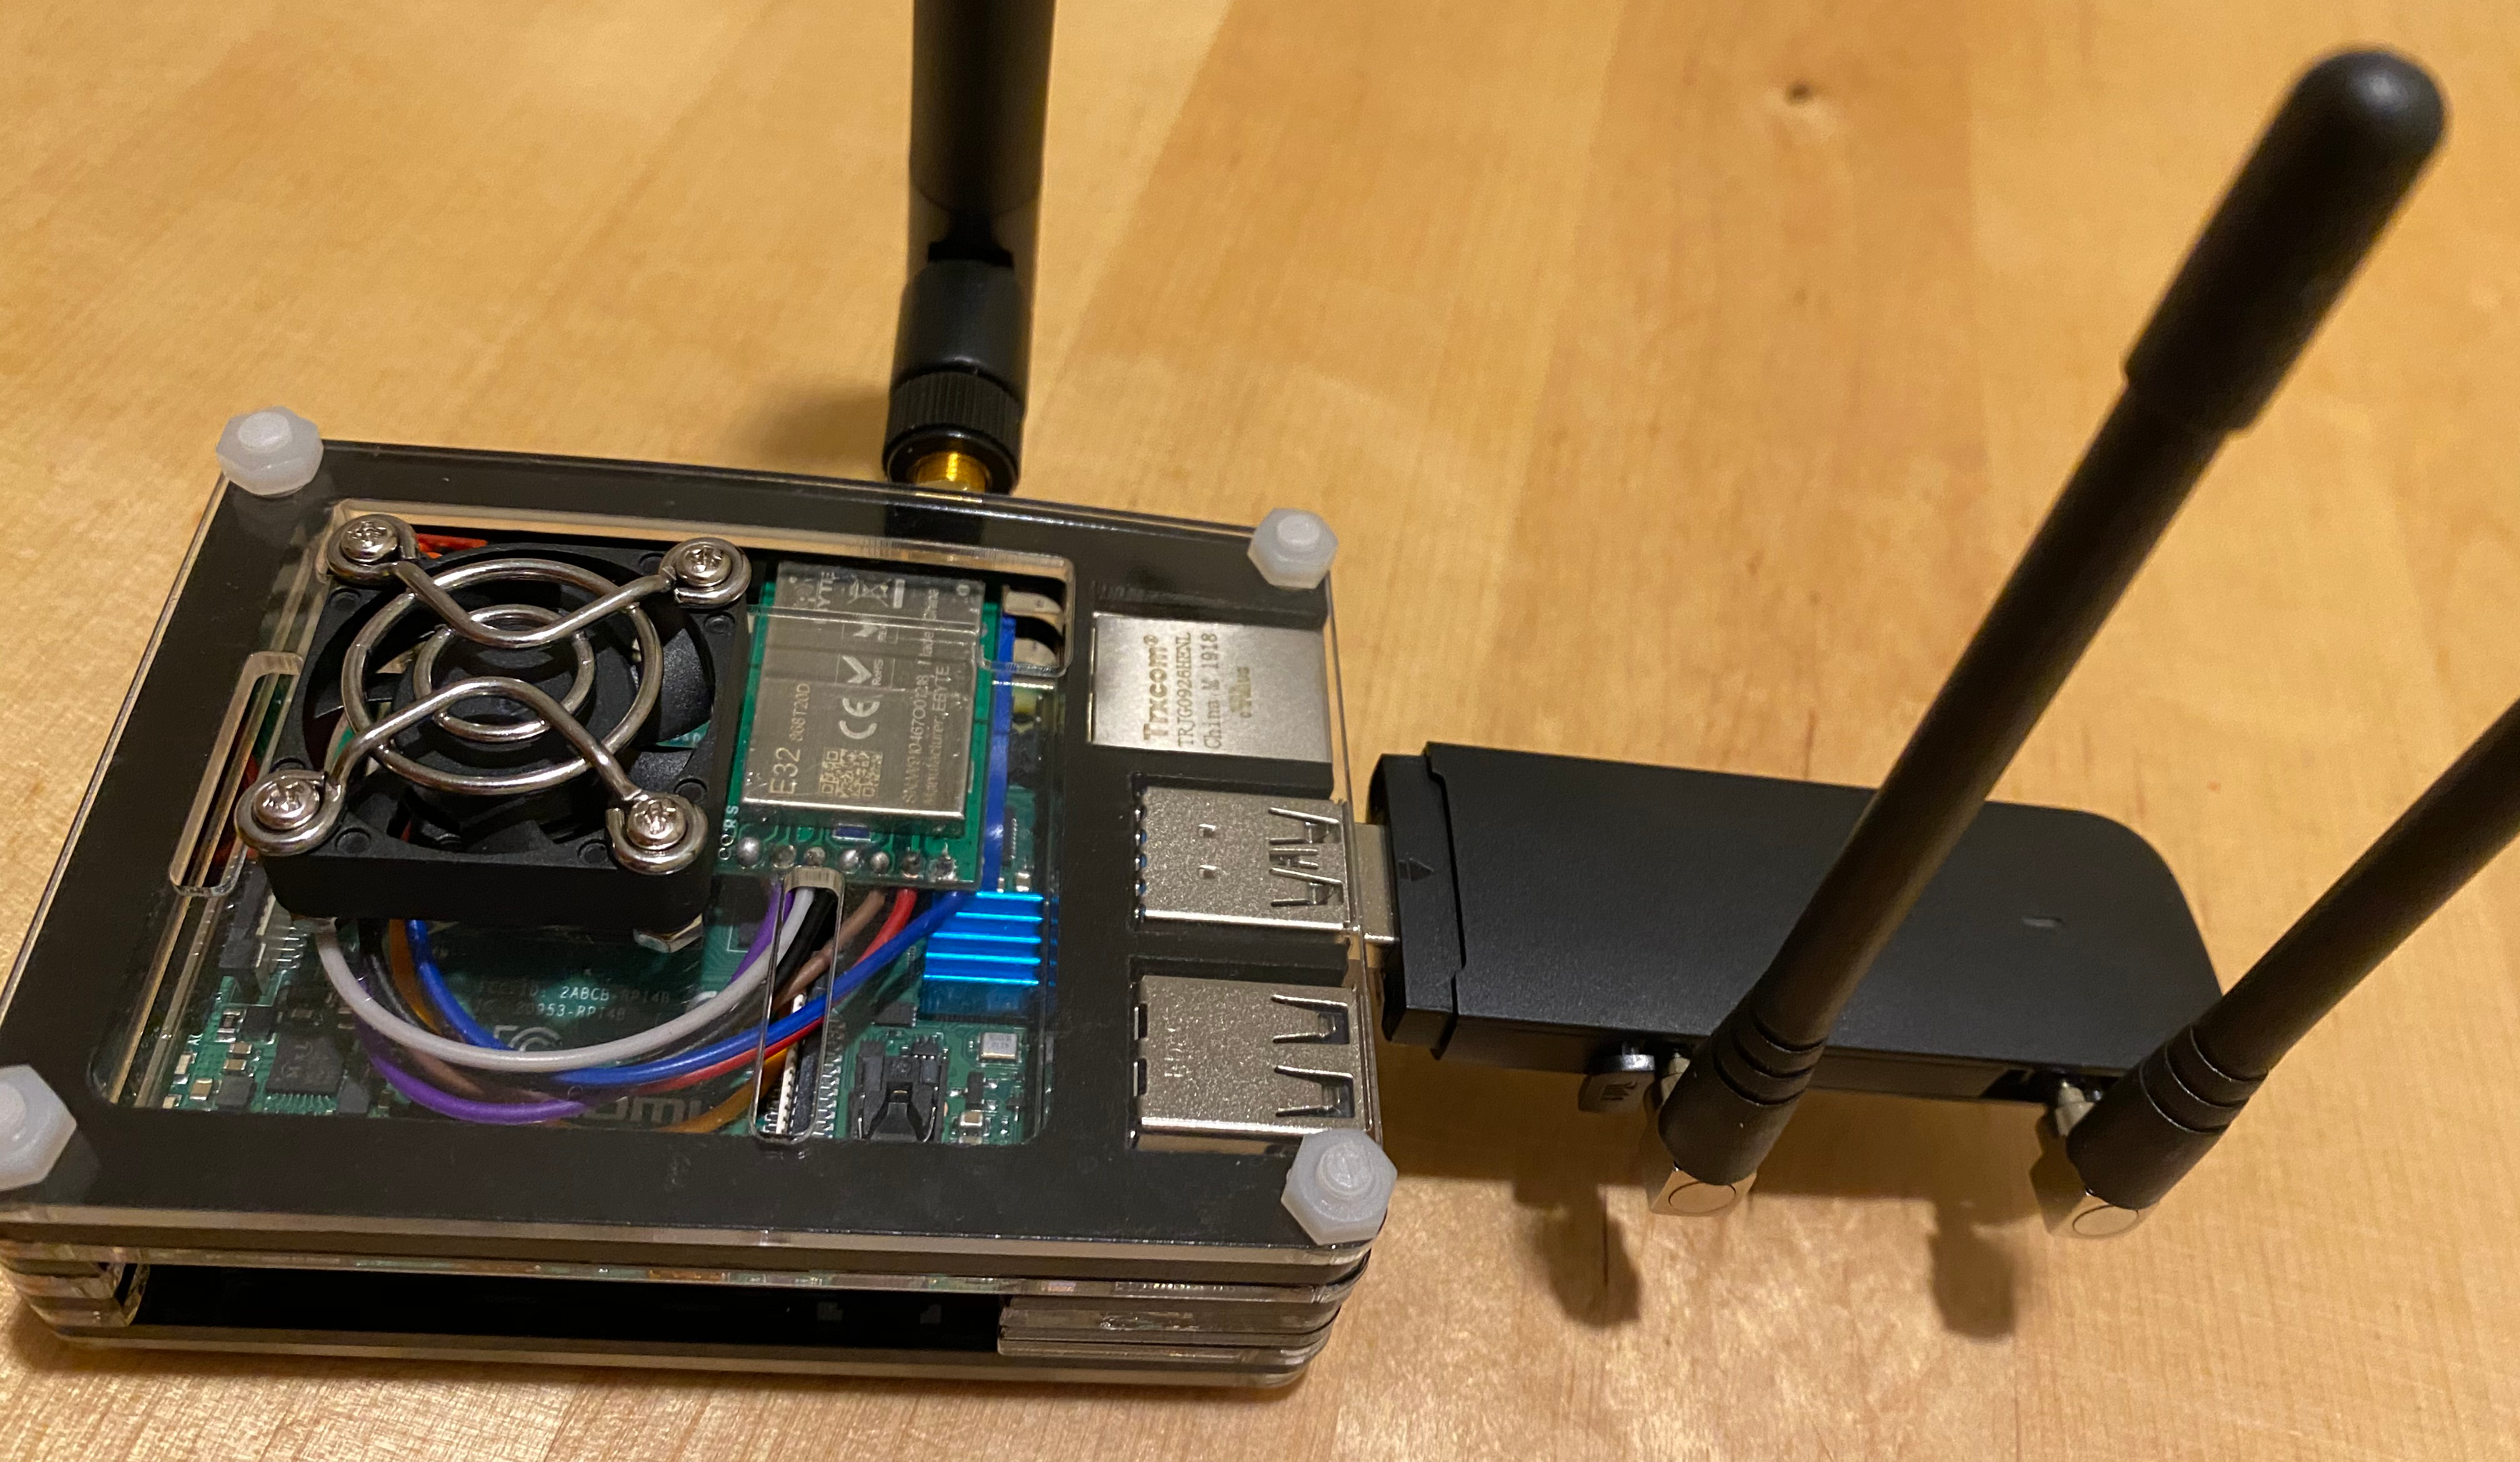
It is possible to find a box where both devices suits together
3) Install fresh Rasbian version. In my case it is Raspbian Buster Lite (https://www.raspberrypi.org/downloads/raspbian/)
4) Put your SD card into raspberry pi and turn it on. Login with username ”pi” and password “raspberry”. Type “sudo raspi-config” in order to change default password and setup network
5) Type “sudo raspi-config” and enable serial communication under “Interfacing Options” > "Serial" . Serial communication is needed to allow ebyte module to exchange data with python “pyserial” package.
6) Install and run loraflow
Use this command in order to start LoraFlow process
Use this command in order to stop LoraFlow process
7) Ready! Now you can send and receive LoRa messages with your Raspberry Pi and store values in OnlineDB.NET database. Here is arduino example which communicates with Raspberry Pi: https://github.com/loraflow-net/loraflow/blob/master/arduino_examples/WaterPumpSwitch/LowPower_switch_v1.ino
Keep in mind that modules E32-868T30D and E32-868T20D are single channel modules

1) Hardware necessary: Raspberry Pi 3 or 4, SD card, and Lora module.
Choose between 8km module: http://www.ebyte.com/en/product-view-news.aspx?id=132 or 3km module http://www.ebyte.com/en/product-view-news.html?id=189
2) Connect the wires between the raspberry pi and the LoRa module as shown in table
| E32-868T30D | Raspberry Pi |
|---|---|
| M0 | GPIO 17 |
| M1 | GPIO 27 |
| RX | GPIO 14 |
| TX | GPIO 15 |
| AUX | - |
| VCC | 3V3 |
| GND | GND |

It is possible to find a box where both devices suits together

3) Install fresh Rasbian version. In my case it is Raspbian Buster Lite (https://www.raspberrypi.org/downloads/raspbian/)
4) Put your SD card into raspberry pi and turn it on. Login with username ”pi” and password “raspberry”. Type “sudo raspi-config” in order to change default password and setup network
sudo raspi-config
5) Type “sudo raspi-config” and enable serial communication under “Interfacing Options” > "Serial" . Serial communication is needed to allow ebyte module to exchange data with python “pyserial” package.
sudo raspi-config
6) Install and run loraflow
git clone https://github.com/loraflow-net/loraflow.git
sudo pip3 install -r loraflow/requirements.txt
chmod +x loraflow/install
./loraflow/install
"sudo nano -w /usr/local/bin/loraflow.py" and add onlinedb.net API KEY
Use this command in order to start LoraFlow process
/etc/init.d/loraflow.sh start
Use this command in order to stop LoraFlow process
/etc/init.d/loraflow.sh stop
7) Ready! Now you can send and receive LoRa messages with your Raspberry Pi and store values in OnlineDB.NET database. Here is arduino example which communicates with Raspberry Pi: https://github.com/loraflow-net/loraflow/blob/master/arduino_examples/WaterPumpSwitch/LowPower_switch_v1.ino